Showing posts with label meat. Show all posts

Wednesday, September 22, 2010

Spaghetti and Meatballs

You are going to love this. This is my new favorite way to eat spaghetti. The meatballs of course are the best thing about this dish. They are so moist and tasty. We will be making this over and over, I'm sure. Instead of buying whole peeled tomatoes in juice, I just bought the Dei Fratelli crushed tomato variety, which eliminated any need for an immersion blender. I added fresh herbs (basil, oregano, and rosemary) to the sauce. I will miss when I can't cut those fresh from my garden anymore. I made this for the missionaries last night and I was blown away by how much they can eat. The yield for this recipe was very large and I was sure we would have enough for two meals, even with the missionaries joining us. I was wrong- they each had three huge servings! Poor hungry missionaries!!

Spaghetti and Meatballs

Sauce

  • 2 28-ounce cans whole peeled tomatoes in juice, drained, juice reserved, tomatoes finely chopped
  • 1/2 cup (1 stick) unsalted butter
  • 2 medium onions, peeled, halved through root end
  • 1/2 teaspoon (or more) salt
  • fresh herbs (rosemary, basil, oregano), optional

Meatballs

  • 1 cup fresh breadcrumbs made from crustless French or country-style bread
  • 1/3 cup whole milk
  • 8 ounces ground beef (15% fat)
  • 8 ounces ground pork
  • 1 cup finely ground (not grated) Parmesan cheese
  • 1/3 cup finely chopped Italian parsley
  • 1 teaspoon salt
  • 1/4 teaspoon freshly ground black pepper
  • 2 large eggs
  • 2 large garlic cloves, pressed
  • 1 pound spaghetti
  • Freshly grated Parmesan cheese (for serving)

Preparation

Sauce

  • Combine tomatoes with juice, butter, onions, and salt in large wide pot. Bring to simmer over medium heat. Reduce heat; simmer uncovered 45 minutes, stirring occasionally. Discard onions. Using immersion blender, process sauce briefly to break up any large pieces of tomato (texture should be even but not completely smooth). Season sauce with more salt and freshly ground black pepper. Add fresh herbs if desired. Remove from heat. (I let mine simmer, covered, until we were ready to eat.)

Meatballs

  • Combine breadcrumbs and milk in small bowl; stir until breadcrumbs are evenly moistened. Let stand 10 minutes.
  • Place beef and pork in large bowl and break up into small chunks. Add 1 cup ground Parmesan, parsley, salt, and pepper.
  • Whisk eggs to blend in small bowl; whisk in garlic. Add to meat mixture.
  • Using hands, squeeze milk from breadcrumbs, reserving milk. Add breadcrumbs to meat mixture. Using hands, quickly and gently mix meat mixture just until all ingredients are evenly combined (do not overmix). Chill mixture at least 15 minutes and up to 1 hour.
  • Moisten hands with some of reserved milk from breadcrumbs, then roll meat mixture between palms into golf-ball-size balls, occasionally moistening hands with milk as needed and arranging meatballs in single layer in sauce in pot. Bring to simmer. Reduce heat to medium-low, cover, and simmer until meatballs are cooked through, 15 to 20 minutes. DO AHEAD Can be made 2 days ahead. Cool slightly. Chill uncovered until cold, then cover and keep chilled. Rewarm before continuing.
  • Cook spaghetti in large pot of boiling salted water until just tender but still firm to bite, stirring occasionally. Drain.
  • Using slotted spoon, transfer meatballs to platter. Add pasta to sauce in pot and toss to coat. Divide pasta among 6 plates. Top each serving with meatballs. Sprinkle meatballs with freshly grated Parmesan cheese and serve.

Friday, March 19, 2010

St. Patrick's Day Dinner 2010

Photobucket


I just love St. Patrick's Day dinner. This year I tried only one new recipe- it was for Colcannon, and it was definitely a hit. I made quite a few changes from the original recipe I found- so here they are below:

Colcannon
Adapted from the Food Network

Ingredients

  • 3 pounds potatoes, scrubbed
  • 1 stick butter
  • 1 cups hot milk
  • Freshly ground black pepper
  • Salt
  • 1/4 head cabbage, cored and finely shredded
  • 1/2 lb. bacon, fried and coarsely chopped
  • Chopped parsley leaves, for garnish

Directions

Peel and roughly chop potatoes, and boil them until tender for about 15 minutes. Mash thoroughly to remove all the lumps. Add 1 stick of butter in pieces. Gradually add hot milk, stirring all the time. (I only needed a little less than 3/4 cup of the milk.) Season with a few grinds of black pepper and a teaspoon or so salt.

Boil the cabbage in unsalted water until it turns a darker color. Add 2 tablespoons butter to tenderize it. Cover with lid for 2 minutes. Drain thoroughly before returning it to the pan. Chop into small pieces.

Add cabbage, scallions, and bacon to mashed potatoes, stirring them in gently. Sprinkle with parsley and check for seasonings.

And here's a list of the rest of the players at this year's annual St. Patrick's Day dinner:


Friday, November 6, 2009

Burritos and Doughnuts

Photobucket
Steak Burritos

These really hit the spot. We had them once for dinner last week and we've had them twice this week. The obsession started after a visit to Chipotle in Kansas City during a fun weekend with the girls. I love meals where each person can build their burrito exactly as they like it. Here's a list of what we like to put in ours:

Marinated and Grilled Steak, cut into bite-sized pieces (recipe below)
Black beans (a can of black beans, drained and rinsed, heated on the stovetop with a little bit of water)
My homemade canned salsa (yet to be blogged, hopefully forthcoming)
Guacamole
Sour cream (left at room temp for about an hour before serving, and thoroughly mixed until it's pourable)
Cilantro Lime Rice (recipe below)
Red peppers and onions sauteed in olive oil (fajita style)

Steak Marinade

Olive oil
Lime juice
Salt and Pepper
(I also used a Southwestern Steak Seasoning.)

Cilantro Lime Rice (supposed to be a copycat recipe from Chipotle)

1 teaspoon vegetable oil or butter
2 tsp. fresh cilantro
2/3 cup white basmati rice
1 cup water
1/2 teaspoon salt
1 Lime

In a 2-quart heavy saucepan, heat oil or butter over low heat, stirring occasionally until melted. Add rice and lime juice, stir for 1 minute. Add water and salt, bring to a full rolling boil. At boiling, cover, turn down to simmer over low heat until rice is tender and the water is absorbed, about 25 minutes. Fluff rice with a fork.

Photobucket
Apple Cider Doughnuts

I know better than to make my own doughnuts, I really do. I just couldn't help myself on this particular day. It was almost like kismet. I had to take a last minute trip to Quincy, IL for some supplies for a church activity coming up and noticed a doughnut shop advertising apple cider doughnuts. I had never heard of such a thing and was intrigued. Then I came home and checked my favorite food blog, smitten kitchen, and she had just fried up the very same doughnuts just days before! It was meant to be. It's not like I really had a choice. I'll just link to her recipe since I didn't change a thing, although I kind of wished I had fried them in shortening instead of oil like she recommends. I didn't read that part until after I made them. Tasty! I liked them better dipped in cinnamon sugar than coated in the glaze. And not only did the whole family love them, but they were fun to make, too!

Wednesday, September 9, 2009

Steak Tacos al Carbon

This recipe goes way back to our first year of marriage, when Bobby tore his ACL in a pick-up game of basketball and had to have surgery. That night after his surgery, I made this for dinner for the first time and we LOVED it. I remember Bobby all sprawled on our full-sized double mattress borrowed from the guest room and carefully sandwiched between our living room furniture. And we slept downstairs for a while since Bobby couldn't make it up the stairs the first week or two. I remember grilling this steak on our George Foreman and I remember Bobby with his swollen knee and enormous leg brace, all drowsy from the painkillers and telling me how much he loved his dinner.

Then for some reason, this recipe was forgotten about until now. Boy am I glad for this reunion. This meat is tasty! BTW, I am feeling better. I found the secret to avoiding nausea is eating. Eating a lot. So I may gain a lot of pregnancy weight (what else is new), but at least I won't feel so nauseous anymore. Now if I could only figure out how to fix the constant headaches and fatigue. And yes, I am being dramatic.

So back to the delicious recipes! I served these on corn tortillas that I briefly toasted over a very hot skillet. I also served them with a delicious tomatillo-avocado salsa that goes with a Martha Stewart recipe I have. Sorry the pictures aren't great. I didn't bother to take them until after we ate. But it was dee-lish!

Marinated Flank Steak

1 1/2- 2 lbs. flank steak
1/2 cup lime juice
4 Tbs olive oil
2 cloves garlic, finely minced
1 tsp salt
1/2 tsp black pepper

In a shallow dish, stir together lime juice, olive oil, garlic, salt and pepper. Add the flank steak and marinate in refrigerator 2-4 hours. (I marinated it overnight.)

Remove steak from marinade. Discard marinade.

Grill steak over medium heat to desired doneness. (It will be perfectly tender at medium rare. Well done will mean rather chewy steak.) It took mine about twenty minutes to grill, ten on each side. Transfer to a cutting board, tent with foil, and let stand for 10 minutes before carnving. Carve steak across the grain into thin slices.


Tomatillo-Avocado Salsa

3 tomatillos, husked, rinsed, and halved
1/2 yellow onion, halved
2 cloves garlic
1 jalapeno chile, stemmed and halved
1/2 cup loosely packed cilantro leaves
juice of 1 lime
1 tsp coarse salt
1/4 tsp black pepper
1 avocado, halved, pitted, peeled, and cut into small cubes

1. Grill tomatillos, onion, garlic, and jalapeno, turning occasionally, until lightly charred, about 10 minutes.
2. Place grilled vegetables in the bowl of a food processor, and add cilantro, juice, salt, and peppe; pulse until coarsely chopped. Transfer to a medium bowl, and fold in avocado.

Sunday, May 24, 2009

Creamiest Lime Cream Meringue Pie

I am so happy to be done with dieting (for now) and back to baking decadent, indulgent desserts. I missed my butter and cream! This was AWESOME! It was a a big hit with Sunday dinner tonight.

My sister's sweet mother-in-law, Sheryl, sent me this amazing cookbook. Dorie Greenspan is a genius. You'll be seeing more from her book on this blog- I can promise you that. Thanks Sheryl!!

Creamiest Lime Cream Meringue Pie
- makes 8 servings -

Ingredients

For the Filling
1 9-inch graham cracker crust, fully baked and cooled

1 cup sugar

Grated zest of 3 limes

4 large eggs, preferably at room temperature

3/4 cup fresh lime juice (from about 6 limes)

A 1-inch chunk of fresh ginger, peeled and finely grated

2 teaspoons cornstarch

2 1/2 sticks (10 ounces) unsalted butter, cut into tablespoon-size pieces, at room temperature

For the Meringue
4 large egg whites, at room temperature

1/2 cup sugar

Procedure
1. Have an instant-read thermometer, a strainer and a blender (first choice) or a food processor at hand. Bring a few inches of water to a simmer in a saucepan.

2. Put the sugar and zest into a heatproof bowl that can be set over the pan of simmering water. Off the heat, rub the sugar and zest between your fingertips for few minutes, until the sugar is moist and the fragrance of lime is strong. Whisk the eggs, then whisk in the juice, ginger and cornstarch.

3. Set the bowl over the pan and start stirring with the whisk as soon as the mixture feels tepid to the touch. Cook the lime cream until it reaches 180 degrees F. As whisk—you must whisk constantly to keep the eggs from scrambling—you'll see that the cream will start out light and foamy, then the bubbles will get bigger, and then, as it gets closer to 180 degrees F, it will start to thicken and the whisk will leave tracks. Heads up at this point—the tracks mean the cream is almost ready. Don't stop whisking or checking the temperature, and have patience—depending on how much heat you're giving the cream, getting it to the temperature can take as long as 10 minutes.

4. As soon as it reaches 180 degrees F, remove the cream from the heat and strain the cream into the container of the blender (or food processor); discard the zest. Let it cool until it reaches 140 degrees F, about 10 minutes.

5. Turn the blender to high speed (or turn on the processor) and add the butter a few pieces at a time. Scrape down the sides of the container as needed as you incorporate the butter. After all the butter is in, continue to blend the cream for another 3 minutes. If you find the machine is getting really hot, work in 1-minute intervals, giving the machine a little rest between beats.

6. Pour the cream into a container, press a piece of plastic wrap against the surface and refrigerate the cream for at least 4 hours, or overnight. (The cream can be packed airtight and and frozen for up to 2 months; thaw overnight in the refrigerator.)

To Finish the Pie with Meringue
1. Preheat the broiler.

2. Whisk the cream to loosen it and spoon it into the pie shell. Place the pie plate on a baking sheet.

3. Working in a clean dry mixer bowl with the clean whisk attachment, or in a large bowl 1ith a hand mixer, whip the egg whites at medium speed until opaque. With the mixer running, add the sugar in a slow stream and continue to beat until the whites are glossy and form firm peaks.

4. Spread the meringue over the lime filling, swirling it if you'd like. Make sure the meringue comes all the way to the edges of the crust, because it will shrink when it bakes.

5. Run the pie under the broiler until the meringue is golden and the tips are dark brown. (Or, if you've got a blowtorch, use it to brown the meringue.) Remove the pie from the oven and let it cool for about 15 minutes, then refrigerate for at least 3 hours before serving.

Graham Cracker Crust
- makes a 9-inch crust -

Ingredients
1 3/4 cups graham cracker crumbs

3 tablespoons sugar

Pinch of salt

1/2 stick (4 tablespoons) unsalted butter, melted

Procedure
1. Butter a 9-inch pie plate.

2. Stir the crumbs, sugar and salt together in a medium bowl. Pour over the melted butter and stir until all of the dry ingredients are uniformly moist. (I do this with my fingers.) Turn the ingredients into the pan and use your fingers to pay an even layer of crumbs over the bottom of the pan. Put the pan in the freezer while you preheat the oven. (The crust can be covered and frozen for up to 2 months.)

3. Center a rack in the over, preheat the oven to 350 degrees F and place the pan on a baking sheet. Bake for 10 minutes. Set the crust aside to cool on a rack.


Mmmmm.... rib-eye steaks for dinner. Rib-eyes could quite possibly be my new favorite cut of meat. We used Daddy Hinkel's southwest rub and sauce. (I'm pretty sure it's a favorite of the Codd family. Now it's a favorite of the Fields family, too.)

Sunday, January 4, 2009

Christmas Eve Dinner

Look, I know everybody is trying to eat healthier now that the holidays are over, myself included, but if I don't get these recipes up now then I never will. I know I'm tempting you now but you'll thank me next year when I have an organized section on my blog where you can find all my holiday recipes!

During the holidays I never like to stray too far from the traditional family favorites. I decided on my Dad's green beans with bacon, my Mom's Christmas orange rolls, and raspberry pretzel jello. I used to feel a little embarrassed about serving raspberry pretzel jello. I think because it's a casserole dish and the name of it makes it sound like a relative of "funeral potatoes." I don't care anymore. I'll say it loud and proud. I LOVE RASPBERRY PRETZEL JELLO! That felt good.

Wes and Jen (Bobby's brother and his wife) shared one of their traditions with us on Christmas day- a delicious Chicken Cordon Bleu with a rich and creamy sauce. When we were planning the menu on the phone, I suggested we serve a ham on Christmas Eve, so we could use the ham in the Chicken Cordon Bleu the next day. Anyway, It was perfect not only for Christmas Dinner, but also the day after Christmas when Wes made omelettes for us. I probably don't even need to say this but I did not take this pictures. My talented sis-in-law Jen took them. I look at these pictures and I feel a little sad because my own attempts at food photography are pathetic in comparison. Jen, thanks so much for sending these pictures!

Photobucket
Mmmm... I sure am missing all the delicious leftovers.
Photobucket
Dad's Green Beans with Bacon

6 or 7 slices of bacon
1 large bag of frozen green beans (I like to use the steamer bags)
freshly squeezed lemon juice
1 tsp garlic, minced

Prepare green beans according to directions on bag. Cut bacon into 1 inch pieces. Fry in a large skillet until crisp. Add green beans and garlic and cook in bacon grease. (If there is an excess of bacon grease, drain some of it off. Just don't send it down the drain!) At this point Dad likes to sprinkle lemon juice over the top. Maggie likes to add a little bit of minced garlic, maybe 1 teaspoon.

Photobucket

Orange Rolls

Your favorite roll recipe. Make the dough at let it rise until doubled:

1 c butter, softened
1 1/2 c sugar
rind of 2 oranges, grated
juice of one orange
enough powdered sugar to make a thick glaze (3 cups?)

To make orange rolls, take dough out of refrigerator three hours before baking. Roll out into a 1/2 inch thick rectangle. Spread softened butter over dough. Mix sugar and orange rind together and sprinkle over butter. Starting with the end of the rectangle, roll up, jelly-roll style. Cut into 1-inch slices using a long piece of floss. Feed it under the roll and take each end of floss and tie a knot right through the roll for a clean slice. Bake for 18 minutes at 350 degrees in a greased muffin tin and drizzle with orange glaze.

Wednesday, October 22, 2008

Sunday Dinner and ooh baby where you been all my life?

I was thinking it would be nice to have kind of a relaxed Sunday dinner this past week. One that wasn't so labor-intensive and that wouldn't take me all afternoon. The weird thing is, I still felt like I spent all afternoon in the kitchen. I think the two-hour nap I got down in our pitch black bedroom might have something to do with that, though. Our family always served fries with this Warner family favorite, but I wanted to mix things up a little so I found a recipe for Sweet Potato Fries. Also, I have a huge supply of apples, so I tried a new recipe for apple sauce. (I'm actually going to include another recipe that I tried and never got around to posting. Both are amazing. The first one is the one calls for sugar and it's a little sweeter and more traditional. The second one has a more complex and unique flavor with the cardamom and mace and everything. Both are worth trying.)


The cake was AMAZING. Brendon and Stephanie came over for games and dessert and I served this and worried we'd have too much left over. I sent them home with two pieces, gave one piece to my sweet neighbor, and the rest Bobby and I have slowly consumed the last few days. There is one sliver left but not for long. It is so good!! We thought it tasted better the next day warmed up in the microwave for a bit.


Now, a lot of my friends have spoken very highly of "the cake mix." They make valid points. I myself use cake mixes from time to time, but please, I beg of you, do NOT underestimate the prowess of the made-from-scratch cake. It is a beautiful thing. Give it a try sometime, and when you do- try this one. It is AWESOME. Just a word about the frosting. I JUST barely had enough to frost this thing. Next time I think I would make more of the frosting. I mean, if you were to take a peak beneath the chocolate peanut butter glaze, you would find one messy crumb-coat. There will definitely be a next time, though.


Sweet Potato Fries

Serves 4.

  • 2 sweet potatoes (about 2 pounds total), peeled and cut into 1/2-by-2-inch sticks
  • 2 tablespoons olive oil
  • Coarse salt and freshly ground pepper
  • 1 tablespoon fresh lemon juice
  1. Preheat oven to 450 degrees. Divide potatoes between two rimmed baking sheets; toss with oil, and season with salt and pepper. Arrange in a single layer without overlapping. Roast, tossing once, until tender and starting to brown, 25 to 30 minutes.
  2. Sprinkle with lemon juice; season with salt and pepper, if desired. Toss to coat.

Applesauce
INGREDIENTS:
2 apples - peeled, cored and
shredded
1 teaspoon ground cinnamon
1/4 cup water
3 tablespoons brown sugar
DIRECTIONS:
1. Place shredded apples in a medium saucepan over medium low heat. Sprinkle with cinnamon, then add water and cook until the apple bits become soft and mushy.
2. Stir in brown sugar and mix well; if desired, top with ice cream and serve.

Applesauce

From Martha Stewart

18 McIntosh apples, (about 6 pounds), peeled, cored, and quartered
1 cup apple cider
1 large cinnamon stick
1/2 vanilla bean
1 teaspoon ground ginger
1/2 teaspoon ground cardamom
1/2 teaspoon ground nutmeg
1/2 teaspoon ground mace
1/2 cup sugar, or to taste
2 tablespoons freshly squeezed lemon juice

  1. Combine apples, apple cider, cinnamon, vanilla bean, ginger, cardamom, nutmeg, mace, sugar, and lemon juice in a large, wide, heavy-bottomed saucepan.
  2. Place the saucepan over medium heat, and cook, stirring often with a wooden spoon to prevent scorching, until apples are broken down and saucy, about 50 to 60 minutes.
  3. Mash any large pieces of apple with a large wooden spoon to help them break down. Adjust seasoning to taste with more sugar and spices.
  4. Remove the apple mixture from the heat, and let stand to cool completely before serving, discarding cinnamon sticks and vanilla pod. Applesauce can also be stored in an airtight container for 2 to 3 days in refrigerator.

Makes about 7 cups.

Chocolate Peanut Butter Cake

Sour Cream-Chocolate Cake with Peanut Butter Frosting and Chocolate-Peanut Butter Glaze
Sky High: Irresistable Triple-Layer Cakes

This cake is INTENSE. Serve it in the thinnest slices possible, and keep a glass of milk handy.

Makes an 8-inch triple-layer cake; serves 12 to 16 (the book says, I say a heck of a lot more)

2 cups all-purpose flour
2 1/2 cups sugar
3/4 cup unsweetened cocoa powder, preferably Dutch process
2 teaspoons baking soda
1 teaspoon salt
1 cup neutral vegetable oil, such as canola, soybean or vegetable blend
1 cup sour cream
1 1/2 cups water
2 tablespoons distilled white vinegar
1 teaspoon vanilla extract
2 eggs

1/2 cup coarsely chopped peanut brittle (I skipped this)

1. Preheat the oven to 350 degrees F. Butter the bottoms and sides of three 8-inch round cakepans. Line the bottom of each pan with a round of parchment or waxed paper and butter the paper.

2. Sift the flour, sugar, cocoa powder, baking soda, and salt into a large bowl. Whisk to combine them well. Add the oil and sour cream and whisk to blend. Gradually beat in the water. Blend in the vinegar and vanilla. Whisk in the eggs and beat until well blended. Scrape down the sides of the bowl and be sure the batter is well mixed. Divide among the 3 prepared cake pans.

3. Bake for 30 to 35 minutes, or until a cake tester or wooden toothpick inserted in the center comes out almost clean. Let cool in the pans for about 20 minutes. Invert onto wire racks, carefully peel off the paper liners, and let cool completely. (Deb note: These cakes are very, very soft. I found them a lot easier to work with after firming them up in the freezer for 30 minutes. They’ll defrost quickly once assembled. You’ll be glad you did this, trust me.)

4. To frost the cake, place one layer, flat side up, on a cake stand or large serving plate. Spread 2/3 cup cup of the Peanut Butter Frosting evenly over the top. Repeat with the next layer. Place the last layer on top and frost the top and sides of the cake with the remaining frosting. (Deb note 1: Making a crumb coat of frosting–a thin layer that binds the dark crumbs to the cake so they don’t show up in the final outer frosting layer–is a great idea for this cake, or any with a dark cake and lighter-colored frosting. Once you “mask” your cake, let it chill for 15 to 30 minutes until firm, then use the remainder of the frosting to create a smooth final coating. Deb note 2: Once the cake is fully frosting, it helps to chill it again and let it firm up. The cooler and more set the peanut butter frosting is, the better drip effect you’ll get from the Chocolate-Peanut Butter Glaze.)

5. To decorate with the Chocolate–Peanut Butter Glaze, put the cake plate on a large baking sheet to catch any drips. Simply pour the glaze over the top of the cake, and using an offset spatula, spread it evenly over the top just to the edges so that it runs down the sides of the cake in long drips. Refrigerate, uncovered, for at least 30 minutes to allow the glaze and frosting to set completely. Remove about 1 hour before serving. Decorate the top with chopped peanut brittle.

Peanut Butter Frosting
Makes about 5 cups

10 ounces cream cheese, at room temperature
1 stick (4 ounces) unsalted butter, at room temperature
5 cups confectioners’ sugar, sifted
2/3 cup smooth peanut butter, preferably a commercial brand (because oil doesn’t separate out)

1. In a large bowl with an electric mixer, beat the cream cheese and butter until light and fluffy. Gradually add the confectioners’ sugar 1 cup at a time, mixing thoroughly after each addition and scraping down the sides of the bowl often. Continue to beat on medium speed until light and fluffy, 3 to 4 minutes.

2. Add the peanut butter and beat until thoroughly blended.

Chocolate-Peanut Butter Glaze
Makes about 1 1/2 cups

8 ounces seimsweet chocolate, coarsely chopped
3 tablespoons smooth peanut butter
2 tablespoons light corn syrup
1/2 cup half-and-half

1. In the top of d double boiler or in a bowl set over simmering water, combine the chocolate, peanut butter, and corn syrup. Cook, whisking often, until the chocolate is melted and the mixture is smooth.

2. Remove from the heat and whisk in the half-and-half, beating until smooth. Use while still warm.

Thursday, August 7, 2008

Sunday Dinner

taco dinner

I realized I haven't been posting new Sunday dinner entries for a really long time. With the weather being so hot, I thought we'd keep it fresh and light. A med school couple we know was giving away their grill and we were the lucky recipients! Bah-duh-bah-bah-bah-- I'm loving it.

Chile Rubbed Steak Tacos with Grilled Tomato Salsa

adapted using recipes from Bobby Flay and Martha Stewart

8 (6-inch) corn tortillas
2 cloves garlic
1 tablespoon plus 1/2 teaspoon coarse salt
2 tablespoons mild chili powder
2 tablespoons light-brown sugar
2 teaspoons smoked or sweet paprika
1 teaspoon ground cumin
1 teaspoon freshly ground black pepper
1 1/2 pounds skirt steak
1/2 head romaine lettuce, thinly shredded
1 medium red onion, thinly sliced
1 ripe avocado, peeled, pitted, halved and diced
Grilled Tomato Salsa, recipe follows
8 ounces sour cream

Heat grill to high.

Wrap tortillas in aluminum foil and on the top rack of the grill while the steak is grilling.

Heat grill pan over high heat. On a work surface, crush garlic cloves using the flat side of a large knife; sprinkle with 1/2 teaspoon salt. Place the flat side of the knife blade on top of the garlic and salt; press firmly, pulling knife toward you. Repeat until a paste forms; transfer to a small bowl. Add chili powder, brown sugar, paprika, cumin, pepper, espresso, and remaining tablespoon salt; stir to combine. Rub mixture all over skirt steak. Grill on one side until golden brown and slightly charred, about 3 to 4 minutes. Turn the steak over and cook to medium-rare doneness, about 3 to 4 minutes longer. Let rest 5 minutes then slice against the grain into 1/4-inch thick slices.

Fill each tortilla with some lettuce, 3 to 4 pieces of meat, onion, grilled tomato salsa, sour cream, and avocado.

Grilled Tomato Salsa:
2 tablespoons canola oil, plus more for brushing tomatoes
2 serrano chiles
1 small red onion, coarsely chopped
4 cloves garlic, peeled
6 plum tomatoes, halved and seeded
Salt and freshly ground black pepper
2 limes, juiced
1/4 cup chopped fresh cilantro leaves

Heat grill to high.

Heat oil in a small saute pan and saute the chiles, onion, and garlic until soft.

Brush tomatoes with oil and season with salt and pepper. Grill on both sides until slightly charred and soft.

Transfer tomatoes and serrano mixture to a food processor; add the lime juice and salt and pepper and process until smooth. Add the cilantro and pulse a few times (there should be flecks of cilantro in the salsa.) Transfer to a bowl.


Grilled Corn on the Cob with BBQ Butter
from Bobby Flay

2 tablespoons canola oil
1/2 small red onion, chopped
2 cloves garlic, chopped
1 tablespoon ancho chili powder
2 teaspoons Spanish paprika
1 teaspoon toasted cumin seeds
1/2 teaspoon cayenne powder
1/2 cup water
1 1/2 sticks unsalted butter, slightly softened
1 teaspoon Worcestershire sauce
Salt and freshly ground black pepper

Perfectly Grilled Corn, recipe follows

Heat the oil in a medium saute pan over high heat until almost smoking. Add the onion and cook until soft, 2 to 3 minutes. Add the garlic and cook for 30 seconds. Add the ancho powder, paprika, cumin and cayenne and cook for 1 minute. Add 1/2 cup of water and cook until the mixture becomes thickened and the water reduces. Let cool slightly.

Place the butter in a food processor, add the spice mixture and Worcestershire sauce and process until smooth. Season with salt and pepper, scrape the mixture into a small bowl, cover and refrigerate for at least 30 minutes to allow the flavors to meld. Bring to room temperature before serving and spread the butter over the corn while hot.

Perfectly Grilled Corn:
4 ears corn
Kosher salt

Heat the grill to medium.

Pull the outer husks down the ear to the base. Strip away the silk from each ear of corn by hand. Fold husks back into place and tie the ends together with kitchen string. Place the ears of corn in a large bowl of cold water with 1 tablespoon of salt for 10 minutes.

Remove corn from water and shake off excess. Place the corn on the grill, close the cover and grill for 15 to 20 minutes, turning every 5 minutes, or until kernels are tender when pierced with a paring knife. Remove the husks and eat on the cob or remove the kernels.

How to remove corn kernels from cob: To remove kernels from cobs of either raw or cooked corn, stand cob upright on its stem end in a large pan, holding tip with fingers. Cut down the sides of cob with sharp paring knife, releasing kernels without cutting into cob. Run dull edge of knife down the cob to release any remaining corn and liquid.


Monday, May 12, 2008

Al Fresco

al fresco

Cheeseburgers. Easy enough, but here's a few simple tricks to make your burgers FABULOUS. I've heard it's a good idea to mix your meats, like 1/2 ground sirloin, 1/2 ground chuck. I just use ground chuck, 80/20 (a little fat in your burger is a good thing.) I put the ground beef in a bowl, shake some Montreal steak seasoning in, about 1/2 tsp Worcestershire sauce, kosher salt, pepper, and sometimes A-1 steak seasoning- although lately we've been leaving it out. Mix in seasonings with your hands or a wooden spoon and start shaping your burgers into patties. (I usually get four small burgers for each pound of meat.) Now, here comes my most important hamburger tip: a pat of butter hidden inside the patty. I'm totally serious. One pat of butter inside your hamburger patty and you'll be thanking your friend Katherine for your totally awesome, moist and delicious hamburger. When you're grilling them or cooking them in a skillet, resist the urge to use your spatula to flatten the patties. You'll squeeze the juiciness right out of them! Butter is also our friend when we're preparing the buns. Spread butter on each side of the bun and broil them for 2 minutes or however long it takes for them to get all toasty and warm. And don't forget the mayo. (NO miracle whip!)

My kids were mostly into the homemade fries. Sometime when I'm not so tired I'll tell you how to make those, too.

Sunday, April 13, 2008

French Food

Yeah, we're pretty classy around here on Thursday nights. French Dip Sandwiches and French fries. I was reading My Kitchen Cafe and saw she made something similar to my recipe and was reminded that we hadn't had this meal in a while and I started to crave it!

I don't know why, but this is one of my favorite Thursday night meals. I think it might be because growing up my Mom always took us into Fountain Valley for dance lessons with Miss Joan on Thursday nights and she didn't have time to make anything but a crockpot dinner, so we would often have this.

1 3-lb boneless chuck roast
1 packet au jus mix
1 tsp garlic powder
½ yellow onion, sliced
1 tsp salt
½ tsp pepper

Place roast and sliced onions in slow cooker
Prepare gravy according to package directions and pour over roast and onions. Sprinkle with garlic powder (and onion powder if using), salt and pepper.
Cover. Cook on low all day (8 hours). Shred meet and return to slow cooker.


(I didn't start making this until about 12:30 PM, so I used my pretty new blue cast iron pot in lieu of the crockpot. It only took 3 1/2 hours for the meat to be tender enough to shred. I ended up shredding it after about 4 hours and just keeping it in the pot until we were ready to eat.)

Deli rolls
Shredded mozzarella cheese
Butter!

Heat your broiler. Place your rolls facing up on cookie sheet and butter bottom side and sprinkle top side with shredded mozzarella. Broil until golden brown. (Keep an eye on them. Should only take 2 or 3 minutes, maybe less depending on how close your rolls are to the broiler.)


Put the shredded meat on your sandwiches, cut in half, and serve with a small cup of the juices from your crockpot.

My mom and dad always served these sandwiches with frozen fries that you bake in the oven. We do that, too, but lately I've been serving them with homemade fries and fry sauce. Yes, I allowed myself to be seduced by the creamy indulgences of a high ration of mayo to ketchup long ago.


In other news, we discovered on Friday that Franny can have No Bake cookies with just a few minor adjustments! I substituted margarine for butter (something that I never thought I would say- but hey, you make certain sacrifices for your kids when you're a mom ;) and rice milk for regular milk. I thought they tasted great. Franny, unfortunately, did not. On the upside, Bobby and I got to pig out on delicious No Bake cookies, so we didn't mind too much that Franny wasn't interested.

Wednesday, April 9, 2008

Can I get you anything? Milk, water, rack of lamb?

My brother used to say that to me all the time. I think it was his way of making a fat joke. :)

It just occurred to me that I really did serve myself a whole rack of lamb! Bobby was REALLY sick last week and I needed to use this meat before it went back, so even though I didn't finish the whole thing off myself, I prepared the whole thing for MYSELF.

On our last trip to Whole Foods in Kansas City (on the way home from the airport), I picked up a few goodies, one of which was my first rack of lamb! I also picked up a fennel bulb. I've been seeing a lot of recipes with fennel, but I can't get it here where I live, so I thought I'd better grab one while I could.


Rack of Lamb Persillade (from Barefoot in Paris)

3 small or 2 large racks of lamb, frenched
Good olive oil
1 1/2 teaspoons kosher salt
1/2 teaspoon freshly ground black pepper
2 cups loosely packed fresh parsley leaves
1 tablespoon chopped garlic cloves (3 cloves)
1 cup fresh white bread crumbs
2 teaspoons grated lemon zest (2 lemons)
4 tablespoons (1/2 stick) unsalted butter, melted
Preheat the oven to 450 degrees F.

Place the racks in a roasting pan, fat side up. Rub the tops with olive oil and sprinkle with the salt and pepper. Roast the lamb for 10 minutes.

Meanwhile, place the parsley and garlic in the bowl of a food processor fitted with the steel blade and process until they're both finely minced. Add the bread crumbs and lemon zest and process for a second until combined.

Take the lamb out of the oven and quickly press the parsley mixture on top of the meat. Drizzle with the melted butter and return immediately to the oven and roast for another 15 minutes.

Take the lamb out of the oven and cover with aluminum foil. Allow it to rest for 15 minutes, cut in double chops, and serve.

Roasted Fennel

  • 2 fennel bulbs (thick base of stalk), stalks cut off, bulbs sliced
  • Olive oil
  • Balsamic vinegar

1 Preheat oven to 400°F.

2 Rub just enough olive oil over the fennel to coat. Sprinkle on some balsamic vinegar, also to coat. Line baking dish with silpat or aluminum foil. Lay out piece of fennel and roast for 15-20 minutes, until the fennel is cooked through and beginning to caramelize.


This was pretty tasty, but I think next time I'll try a fennel-potato gratin.

Wednesday, January 2, 2008

Christmas Eve

We've been spending Christmas Eve with my Mom's brothers and sisters for as long as I can remember. It's a long-standing tradition that I really look forward to and enjoy. It's usually held at either my aunt Gayle's or aunt Cindy's house. Since Cindy and Gayle worked so hard hosting the Sant Christmas Party (a party that my Mom has been hosting since the 80's), I offered to host Christmas Eve with my Dad at his house.

It's a pretty laid-back party. A nice dinner is served and we have a gift exchange and just hang out and visit into the night. I decided to serve a roasted pork loin with my Mom's Swiss cheese potatoes, homemade rolls, and a raspberry cheesecake. Gayle brought artichoke dip and her famous creamed corn. Cindy brought one of her fabulous salads. (She really makes the greatest salads.) And my Dad made his signature Christmas dessert, rice pudding, which he whipped together in record time as the party was starting. It all came together nicely and my sister Annie and I had a fun time getting everything ready together. She basically cleaned the whole house for the party while I cooked. Here's some pictures of the food.


I was really happy with the cheesecake. Cheesecakes often give me trouble. I always end up with huge unsightly cracks in the top from baking too long- which is why I always serve it with this raspberry topping. This time I made sure that the top still jiggled just a little bit in the middle when I took it out. Worked like a charm.

Here's some more pics from Christmas Eve.
Here I am with my aunt Gayle and aunt Cindy. I love both these women so much.
Here's Julia dipping into the rice pudding. Oh yeah.
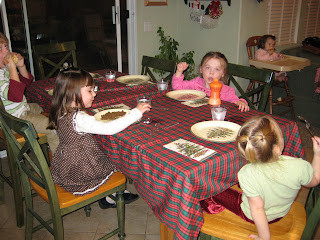
And here's the kids table. My Uncle Lauren has four small kids all very close in age and Franny was in heaven! She can't stop talking about them even now.

Roast Loin of Pork with Fennel


2 garlic cloves, minced
1 Tbs kosher salt
1 Tbs fresh thyme leaves
1/4 cup dijon mustard
1 3 lb boneless pork loin, trimmed and tied
3 small fennel bulbs, tops removed
10 carrots, peeled and thickly sliced diagonally
10 small potatoes, quartered
2 onions, thickly sliced
4 Tbs good olive oil
4 Tbs butter, melted
salt and freshly ground pepper

Preheat the oven to 425 degrees.

With a mortar and pestle or in the bowl of the food processor fitted with a steel blade, grind together the garlic, salt, and thyme leaves. Add the mustard and combine. Spread the mixture over the loin of pork and allow it to sit at room temp for at least 30 minutes.

MEanwhile, cut the fennel bulbs into thick wedges, slicing through the core. Toss the fennel, carrots, potatoes, and onions in a bowl with the olive oil, melted butter, salt, and pepper.

Tranfer the vegetables to a large roasting pan and cook for 30 minutes. Add the pork loin to the pan and continue to cook for another 30 to 50 minutes, or until a meat thermometer inserted in to the middle of the pork reads exactly 138 degrees. Remove the meat from the pan and return the vegetables to the oven to keep cooking. Cover the meat with aluminum foil and allow it to rest for 15 minutes. Remove the strings from the meat and slice it thickly. Arrange the meat and vegetables on a platter. Sprinkle with salt and pepper.

(I didn't take the time to tie up the roast and I thought it was great. I also left all the vegetables out this time.)

Cheesecake

This is my FAVORITE cheesecake recipe. Any flavored cheesecake I make is a variation on this. It tastes delicious and I wouldn't think about trying any other recipe! I took 1 1/2 baskets of fresh raspberries and tossed it with about 1 cup of heated raspberry preserves. I also made a raspberry coulis to go with it.

Crust
5 Tbs butter, melted, plus 1 Tbs melted butter for the pan
8 whole graham crackers (4 oz), broken into rough pieces and processed in a food processor to fine, even crumbs
1 Tbs sugar

Filling
2 1/2 lbs (5 8oz packages) cream cheese, cut into rough 1 inch chunks, at room temperature
1/8 tsp salt
1 1/2 cups sugar
1/3 cup sour cream
2 tsp juice from 1 lemon
2 tsp vanilla extract
2 large egg yolks, plus 6 lare eggs, at room temp

1. For the crust: Adjust an oven rack to the lower middle position and heat the oven to 325 degrees. Brush the bottom and sides of a 9 inch spring form pan with 1/2 Tbs of melted butter. Combine the graham cracker crumbs and sugar in a medium bowl; add 5 Tbs of the melted butter and toss with a fork until evenly moistened. Empty the crumbs into the springform pan and press evenly into the pan bottom. Bake until fragrant and beginning to brown around the edges, about 13 minutes. Cool on a wire rack while making the filling.

2. For the filling: Increase the oven temp to 500 degrees. In the bowl of a standing mixer, beat the cream cheese at medium-low speed to break up and soften it slightly, about 1 minute. Scrape the beater and the bottom and sides of the bowl well with a rubber spatula; add the salt and about half the sugarand beat at medium low speed until combined, about 1 minute. Scrape the bowl; beat in the remaning sugar until combined; about 1 minute. Scrape the bowl; add the sour cream, lemon juice, and vainlla, and beat at low speed until combined, about 1 minute. Scrape the bowl; add the egg yoks and beat at medium-low speed until throughly combined, about 1 minute. Scrape the bowl; add the remaining eggs, two at a time, beating until thoroughly combined, about 1 minute, scraping the bowl between additions.

3. Brush the sides of the springform pan with the remaing 1/2 Tbs of melted butter. Set the springform pan on a rimmed baking sheet. Pour the filling into the cooled crust and bake 10 minutes; without opening the oven door, reduce the oven temp to 200 degrees and continue to bake until the cheesecake registers about 150 degrees on an instant-read thermometer inserted in the center, about 1 1/2 hours. (Might take longer) Transfer the cake to a wire rack and cool until barely warm, 2 1/2 to 3 hours. Run a paring knife between the cake and the pan sides. Wrap tightly in plastic wrap and refrigerate until cold, at least 3 hours.

4. To unmold the cheesecake, remove the sides of the pan. Slide a thin metal spatula between the crust and the bottom of the pan to loosen, then slide the cake onto a serving plate. Let the cheesecake stand at room teperature about 30 minutes, then cut into wedges.

Swiss Cheese Potatoes


This is my Mom's favorite potato recipe for Christmas dinners. I totally blame this dish alone for the eighteen pounds I gained in one month when I was pregnant with Franny. I was home for Christmas and there was plentiful amounts of this leftover in the fridge. It's good stuff.

2 c. milk
1/2 c butter
salt and pepper
3 lbs. baking potatoes
6 cloves garlic
1 c heavy cream
1 c grated Swiss cheese

Combine first four ingredients in large pan and bring to a boil. Peel potatoes and slice them really thin. Drop into hot milk. Blend in garlic and cream. Return to boil, simmer for 15 minutes. Potatoes should be 1/2 done. Pour liquid and potatoes into a buttered baking dish. Sprinkle with cheese and bake at 325 for 30 minutes.

Tuesday, September 18, 2007

Sunday Dinner

Photo Sharing and Video Hosting at Photobucket

Buttermilk Mashed Potatoes

kosher salt
3 lbs. boiling potatoes (I just used russet)
1/2 cup whole milk (I used 1%)
1/4 lb. butter
3/4 - 1 cup buttermilk, shaken
1/2 tsp freshly bround black pepper

In a large pot, bring 4 quarts water and 2 Tbs salt to a boil. Meanwhile, peel the potatoes and cut them into 1 1/2 inch cubes. Add them to the boiling water and bring the water back to a boil. Lower the heat and simmer uncovered for 10 - 15 minutes, until the potatoes fall apart easily when pierced with a fork.
Meanwhile, heat the whole milk and butter in a small saucepan, making sure it doesn't boil. Set aside until the potatoes are done. As soon as the potatoes are tender, drain them in a colander. Use a food mill or a potatoe masher to mask the potatoes and as soon as they are mashed, stir in the hot milk-and-butter mixture with a rubber spatula. Add enough buttermil to make the potatoes cramy. (DO not heat buttermilk- it will curdle.) Add 2 teaspoons of salt and the pepper, or more to taste, and serve hot. To keep the potatoes warm, place the bowl over a pan of simmering water for up to 30 minutes. YOu can add a little extra hot milk to keep them creamy.

Roast (Cole's famous recipe. Cole is my dad.)

Tri-tip roast (if you can find one, which I couldn't. I asked the butcher for something similar and he gave me a sirloin roast that worked out great. He had to package it for me separately. It's a cut of meat that they slice and sell as steaks, but they can sell it to you as a roast and you just pay the price per pound that they charge for the steaks.)

Seasoning (my dad uses Emeril's steak rub. I used McCormick's Montreal Steak seasoning because that's all I had on hand.)

Season outside of roast with the seasoning and place on a baking sheet. Broil for about 15 minutes. Turn the heat down and roast beef until the internal temperature is 135 (if you like medium rare) and then take the roast out of the oven and tent with foil. Let meat rest for 20 minutes before slicing.

Serve with horseradish cream if desired. My parents always served it this way and I love it. Whip some heavy cream and mix in a few Tbs. of horseradish! It tastes delicious!


Green Beans with Honey Cashew Sauce

1 lb. fresh green beans

3 Tbs butter
1/2 cup coarsely chopped salted cashews
2 Tbs honey

Steam green beans until tender, drain and set aside in saucepan. In small skillet, saute cashews in butter over low heat for 5 minutes. Add honey and cook 1 minute longer, stirring constantly. Pour sauce over beans and toss until coated.
Related Posts with Thumbnails